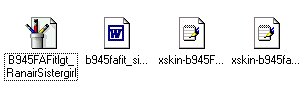
 Bitmap, .cmx and two xskin files for one Female Fit Body skin
Editing A Mesh File--
Basic Renaming Of The Mesh Components
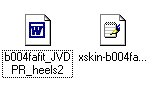
Let's say you have two mesh files with the same prefix; for example, B004FAfit_01  by Maxis and
B004FAfit_JVDPR_Heels2.   JVDPR  put a heel onto this basic Maxis  mesh, but now you have
two sets of the same skins: One with a heel and one without. You want to keep the heel mesh,
you just don't want ALL of the  B004 bitmaps to show up with and without the heel. Solution?
Edit the JVDPR mesh and give it a new name so that you have two different meshes.
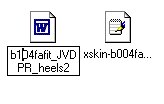
                                   You will need to locate the B004FAFit_JVDPR_Heels2.cmx
                                                                    and xskin-B004FAFit_JVDPR_Heels2-PELVIS-BODY files in
                                                                    the skins folder.  COPY these files and PASTE them somewhere
                                                                    outside of the Skins folder; another folder or your desktop,
                                                                    which ever you prefer.  I have a special folder in The Sims folder
                                                                    where I paste and edit files.
 B004FAfit_01 B004FAfit_
JVDPR_Heels2
B004FAfit_01   B004FAfit_
                        JVDPR_Heels2
Step 1
Editing The .CMX File
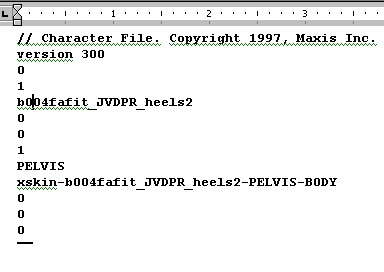
1. Double click the .cmx file to open it. It will open as a text document. You will see
the type/name of the file, with the Maxis copy right year and version number, at the very top of the
file. Then, there are 11 lines indicating the 3 different components of the .cmx file. From top to
bottom, the lines are:
1) 0
2) 1
3) the complete mesh identification
4) 0
5) 0
6) a number indicating how many xskin files are attached to the .cmxfile (in this case, 1)
7) the xskin part name (for a body file, usually Pelvis)
8) the complete name of the xskin file
9) 0
10) 0
11) 0
 All .cmx files look basically like this one. As more separate mesh files are added (as attached
meshes), there can be more lines in a .cmx file, and, therefore, more xskin files listed. However,
since this is a simple body mesh, the only xkin file is the Pelvis-Body file (for craniums, it is the
Head-Head file).
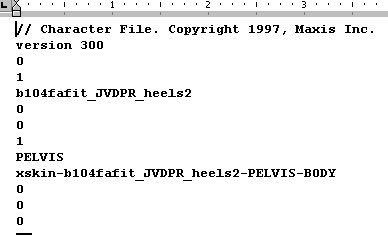
2. For this example, we are only going to change the first digit in the .cmx ID and the Pelvis-Body
name. Everything else will stay the same.
Choose a new number carefully. If this is only for your own personal use, you want to be sure
that you have no other mesh files with that same prefix.
If you are editing this mesh to be redistributed (be sure to have the meshers approval prior to
redistributing), then you would want to try to create an ID that is not being used. This,
however, is now impossible to know due to the many skinners who are currently editing meshes.
Sometimes it is best to go with a completely unique name. Unique ID's will be covered
later in this tutorial.
Make your changes by deleting the first 0 in the prefix and replace it with a number in both
line 3 and line 8.
Then select File>Save and save the file. DO NOT choose to SAVE AS. You will NOT rename
the file at this point, just the components.
All .cmx files look basically like this one. As more separate mesh files are added (as attached
meshes), there can be more lines in a .cmx file, and, therefore, more xskin files listed. However,
since this is a simple body mesh, the only xkin file is the Pelvis-Body file (for craniums, it is the
Head-Head file).
2. For this example, we are only going to change the first digit in the .cmx ID and the Pelvis-Body
name. Everything else will stay the same.
Choose a new number carefully. If this is only for your own personal use, you want to be sure
that you have no other mesh files with that same prefix.
If you are editing this mesh to be redistributed (be sure to have the meshers approval prior to
redistributing), then you would want to try to create an ID that is not being used. This,
however, is now impossible to know due to the many skinners who are currently editing meshes.
Sometimes it is best to go with a completely unique name. Unique ID's will be covered
later in this tutorial.
Make your changes by deleting the first 0 in the prefix and replace it with a number in both
line 3 and line 8.
Then select File>Save and save the file. DO NOT choose to SAVE AS. You will NOT rename
the file at this point, just the components.
 3. Close the file.
Step 2
Renaming The .CMX File
Double click at the end of the file name to set the pointer for editing, then change the number.
3. Close the file.
Step 2
Renaming The .CMX File
Double click at the end of the file name to set the pointer for editing, then change the number.
 Step 3
Editing the Xskin File
Next, you will edit the Pelvis-Body file.
1. Double click on the xskin file to open it.
Step 3
Editing the Xskin File
Next, you will edit the Pelvis-Body file.
1. Double click on the xskin file to open it.
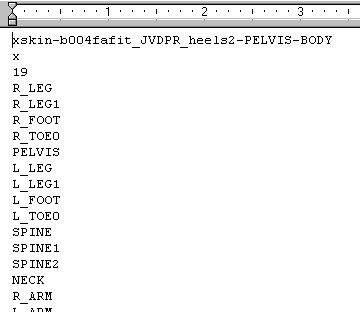 NOTE: if there is a second line below the xskin file name, be sure that it is EXACTLY the same
as the file name, and that there is no skin tone associated with it. For example, if the second
line read B004FAfitlgt_JVDPR_Heels2, delete the "lgt". You want this Pelvis-Body file to be
universal, otherwise your game may crash or it will cause problems when skinning.
2. Edit the Pelvis-Body file name to match the listing in the .cmx file EXACTLY. Select File>Save
to save, then close the file.
Step 4
Renaming The Xskin File
Rename the file as you did the .cmx file. Remember: it is VERY IMPORTANT that all of the
mesh file names match. What ever you typed in the components of the .cmx file must follow
through on ALL renaming: ALL parts must Match EXACTLY. This is the biggest mistake
in editing .cmx files and why games will crash.
NOTE: if there is a second line below the xskin file name, be sure that it is EXACTLY the same
as the file name, and that there is no skin tone associated with it. For example, if the second
line read B004FAfitlgt_JVDPR_Heels2, delete the "lgt". You want this Pelvis-Body file to be
universal, otherwise your game may crash or it will cause problems when skinning.
2. Edit the Pelvis-Body file name to match the listing in the .cmx file EXACTLY. Select File>Save
to save, then close the file.
Step 4
Renaming The Xskin File
Rename the file as you did the .cmx file. Remember: it is VERY IMPORTANT that all of the
mesh file names match. What ever you typed in the components of the .cmx file must follow
through on ALL renaming: ALL parts must Match EXACTLY. This is the biggest mistake
in editing .cmx files and why games will crash.
 Previewing and Checking The Edited Mesh Files
Using Sim Show and The Sims Character Makeover Studio
You should preview your edited mesh file to be sure that you did not make any mistakes. You can
preview the mesh file using SimShow or The Sims Character Makeover Studio. Both programs
load faster than the game, you don't need a bitmap texture to preview, and you can keep them
open while you edit any files and reload the texture/mesh. Unlike the game, where you can not view
a mesh without a texture, and you would have to exit the game and wait for it to load every time
you wanted to view a change. I prefer to use the latter because the images appear larger. You can
download both programs at The Sims Resource under Downloads, or Sim Programs under
Programs. Both tools are free.
1. First you must CUT and PASTE the edited files into the proper folder to preview. If you are
using SimShow, paste the edited files into the GamesData/People1 folder. If you are using
Character Makeover, paste the files into the Skins folder.
2. Open the program. In SimShow, select Female-Adult-Fit and any skin tone, then scroll
down to find the mesh name in the "Bodies" category. The mesh will appear as a white 3-D
"blob-like" sculpture unless you select a texture. Be prepare to view a weird looking skin if
a texture is selected that was not made to fit the mesh. If you are satisfied, select "Import" to
to send the new mesh files to the Skins folder.
In Character Makeover, you'll have to LOAD a female adult character from the listing in
your UserData folder (this will be the default folder that opens in the window after you click
"Load a Sim").
NOTE: The characters are listed by numbers, not by name, so you will have to search until you
find a female adult. Once you find a female adult character, select Fit, and any skin tone. Then
scroll down to find the mesh name in the "Body Mesh" category. The mesh will appear as a
white 3-D "blob-like" sculpture if the mesh was edited from a Maxis file. It will appear as a gray
with a checkered-like pattern if the mesh was edited from a user created mesh.
Previewing and Checking The Edited Mesh Files
Using Sim Show and The Sims Character Makeover Studio
You should preview your edited mesh file to be sure that you did not make any mistakes. You can
preview the mesh file using SimShow or The Sims Character Makeover Studio. Both programs
load faster than the game, you don't need a bitmap texture to preview, and you can keep them
open while you edit any files and reload the texture/mesh. Unlike the game, where you can not view
a mesh without a texture, and you would have to exit the game and wait for it to load every time
you wanted to view a change. I prefer to use the latter because the images appear larger. You can
download both programs at The Sims Resource under Downloads, or Sim Programs under
Programs. Both tools are free.
1. First you must CUT and PASTE the edited files into the proper folder to preview. If you are
using SimShow, paste the edited files into the GamesData/People1 folder. If you are using
Character Makeover, paste the files into the Skins folder.
2. Open the program. In SimShow, select Female-Adult-Fit and any skin tone, then scroll
down to find the mesh name in the "Bodies" category. The mesh will appear as a white 3-D
"blob-like" sculpture unless you select a texture. Be prepare to view a weird looking skin if
a texture is selected that was not made to fit the mesh. If you are satisfied, select "Import" to
to send the new mesh files to the Skins folder.
In Character Makeover, you'll have to LOAD a female adult character from the listing in
your UserData folder (this will be the default folder that opens in the window after you click
"Load a Sim").
NOTE: The characters are listed by numbers, not by name, so you will have to search until you
find a female adult. Once you find a female adult character, select Fit, and any skin tone. Then
scroll down to find the mesh name in the "Body Mesh" category. The mesh will appear as a
white 3-D "blob-like" sculpture if the mesh was edited from a Maxis file. It will appear as a gray
with a checkered-like pattern if the mesh was edited from a user created mesh.
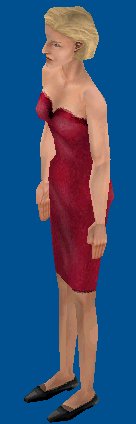
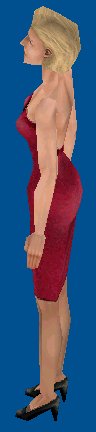
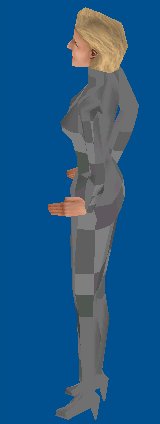 The new B104FAFit_JVDPR_Heel2 mesh as it appears in The Sims Character Makeover
Studio without a texture.
Note: If Character Makeover crashes when you are searching for a female adult character,
reload the program and try another character number. This simply means that the character chosen
does not exist any longer in that neighborhood. The game does not delete the character's assigned
number if the character has died or was deleted from game play. It may take a few tries to find a
suitable female adult character to use. Once you do, note that number, and always use this same
character to preview meshes and skins. Do the same for a male child and a female child for future
use.
IF EITHER PROGRAM CRASHES WHEN YOU SELECT YOUR EDITED MESH FILE ID,
THEN THERE IS AN ERROR IN THE MESH. Check that ALL file names match internally and
externally (see Troubleshooting).
Click HERE to continue with tutorial..... Click HERE to return to table of contents
The new B104FAFit_JVDPR_Heel2 mesh as it appears in The Sims Character Makeover
Studio without a texture.
Note: If Character Makeover crashes when you are searching for a female adult character,
reload the program and try another character number. This simply means that the character chosen
does not exist any longer in that neighborhood. The game does not delete the character's assigned
number if the character has died or was deleted from game play. It may take a few tries to find a
suitable female adult character to use. Once you do, note that number, and always use this same
character to preview meshes and skins. Do the same for a male child and a female child for future
use.
IF EITHER PROGRAM CRASHES WHEN YOU SELECT YOUR EDITED MESH FILE ID,
THEN THERE IS AN ERROR IN THE MESH. Check that ALL file names match internally and
externally (see Troubleshooting).
Click HERE to continue with tutorial..... Click HERE to return to table of contents
About Skin Files (Primer)
It takes at least three files to create a 3-D skin: one bitmap texture and two mesh files.
There are at least three files for every body and three files for every head.
Parts Of A File Name
Body files should begin with the letter "B" and  head files, or craniums,
begin with the letter "C". Next is the  unique three digit file identification number. The next two
letters represent sex and age: Female Adult, Male Adult, Female Child and Male Child. The next
three represents the body type: Fit , Fat, and Skn for skinny, or Chd for Child. The last
three letters of a bitmap file name represents the skin tone: dark (drk), light (lgt) or medium
(med). You should not find the skin tone designations on mesh  files since  mesh files should
to be universal.
Several different textures can be named to match the same mesh files to create new skins.
The Three Files
The bitmap is the flat schematic texture, what we referred  to as the "skin". It is what
gives each particular skin it's looks.  The bitmap texture wraps around the 3-D mesh
to make the final character.    There may be more than one bitmap to a skin.
The .cmx file is the first part of the mesh file. It contains a list of the components of the 3-D
form and the mesh ID. There is always only one Cmx file to every skin.
The xskin file  has the data to create the actual 3-D mesh. Since I don't make meshes,
I can't explain exactly how it works. However, in some mystical magical way, a PC is able to
read this file to create the 3-D image that you see in your game. There can be more than one
xskin file to a skin.
If any part of a mesh file can not be read by your PC, or parts are missing, your system
becomes confused and your game crashes.
You can easily locate all the skin files in the Skins folder  inside of the GameData folder under
The Sims. If you select "View>Arrange  Icons>By Type" in your tool bar, you will see the
three sets of files.  The bitmaps will be first, then the .cmx files, and last the xskin files. They are
matched by the prefix of each file ID.